TikTok Messages Disappear - How To Fix It

TikTok Messages Disappear – Here’s why and how to fix it!

I saw that some users have reported being unable to view their messages on the TikTok site. Some people have difficulty with TikTok messages disappearing while others have trouble sending and receiving messages.

Although TikTok does not encourage active direct chat, user contact on the network is essential to building a sense of community.

I decided to investigate what might be wrong in order to make it easier for us to solve the issue.

The following factors are typically responsible for disappearing messages and message issues on TikTok:

  • User-deleted messages;
  • Glitches or bugs;
  • Server errors;
  • Poor network connections;
  • Recently registered accounts;
  • Unverified contact information;
  • Chatting with individuals, not on your list of friends

Your TikTok messages disappear due to a number of other circumstances. Let’s get the complete scenario by learning more in this quick read about the reasons behind your TikTok messages disappearing problem, how to retrieve your messages, and how to avoid a repetition of the current condition.

Table of Contents

What Causes Why My TikTok Messages Disappear?

Your inability to access your TikTok messages may be caused by all of the following factors, one in particular, or a combination of them.

Message Removed by the user:

TikTok Messages Disappear

The user deleting the message is the first potential reason for TikTok messages to vanish. Your TikTok messages can be deleted knowingly or accidentally. It might be as disastrous as deleting all of the messages from your account. As a result, you should exercise caution when using the messaging feature on the platform.

Issues with the TikTok app

The existence of faults and kinks in the program will hinder the app’s overall usability. This may decrease the platform’s message feature’s effectiveness and result in you losing access to your messages. By deleting your account’s cache, you can make more room in your account. If your app is out of date, you can also update it to resolve the issue.

Error from the server

You will have trouble sending and receiving messages if the TikTok server is offline owing to maintenance being done on it or for any other reason. You’ll probably receive a notification saying that you can’t send messages.

Unreliable network connection

Your actions on the TikTok platform will be interrupted by a bad network connection because you require a reliable and secure internet source to function. If the network connection is poor, you won’t be able to send or receive messages. This can be fixed by shutting off your network connection, activating flight or airplane mode for a brief period of time, then turning it back off and starting your network connection once more. This ought to make the issue go away.

Recent Account Registration

If you had to register your account from scratch, your communications would be lost. This is due to the fact that your messages will be lost because your account will be reset to its original state and be as good as new.

Unreliable Contact Information

If your account is new and you are experiencing problems with texting, it may be because your phone number is not validated. For you to receive messages on the site, your phone number must first be validated.

Talking With Someone Not on Your Friends List

On the site, only individuals who are your friends—i.e., your followers and those you are following—can send and receive messages to you. Messages sent to anyone, not on this list will not be sent.

Favourite Recipients – Why TikTok Messages Disappear

Your messages won’t be received if the person to whom you are sending them has changed their privacy settings to prohibit you or anyone else from sending them a text. You have no control over the situation unless the user modifies their settings to accept communications.
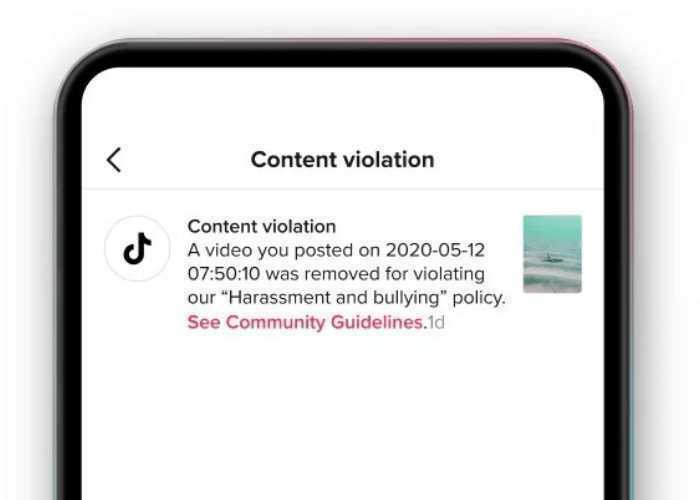
Ban on TikTok

Everything in your account will change if your account is banned. After the ban is lifted, your communications will be lost, and you won’t be able to do anything with the account. Maintain the TikTok community’s norms of behaviour to avoid having your account banned.

Underage

Users under the age of 16 are not permitted to manage a public account on TikTok. Those users are unable to use the messaging feature as a result.

How to Retrieve Lost TikTok Messages

Let’s look at how to recover pertinent messages that have been deleted now that you are aware of what caused the disappearance, deletion, or malfunction of the messaging functionality on your TikTok account. The following discussion covers two methods for recovering lost or missing TikTok messages.

First Approach: Data Backup

Via its backup and recovery tool, TikTok offers a way for you to retrieve any messages you may have accidentally deleted. You can request your lost data through the TikTok data backup tool, and it will be sent to you. Please be aware that receiving the requested backup data may take some time. Nonetheless, the procedure is straightforward. You can get help by following these steps.

Step 1: Launch the TikTok Network

Launch the mobile application from your smartphone if you are using the web version of TikTok, or log into your account using your web browser if you are using the TikTok app.

Step 2: Open Your TikTok Account

The “me” symbol is located at the bottom of the homepage; find it and click it to open your TikTok profile.

Step 3. Go to “Privacy and Safety.”

The profile menu contains the Privacy and Safety option. On the top of your profile page, there is a three-dot icon (•••) that stands in for the menu. Open the icon, then select Privacy and Safety.

Step 4: Launch the Customization and Data Option.

You will see two options when the Privacy and Safety section is opened: one is the “Download Data” option, and the other is the “Personalization and Data” option. Launch it by selecting Personalization and Data.

Step 5: Choose “Download Your Data”

You have the luxury of picking the option to obtain your backed-up data if you choose Customization and Data rather than Download Data directly. You must select the Download Your Data option on this page in order to make a request for your data (Personalization and Data page).

Step 6: Request your data.

When choosing “Download Your Data,” pick the option to obtain a data file.

Step 7: Verify Your Information Is Available

You must navigate to the Privacy and Safety section of your account and choose the Download Data option in order to check the status of your request because you do not always receive a response right away. If it has, the file will be accessible in the Download section; otherwise, a “Pending” message will appear. Recheck the page.

Step 8: Download your data.

You can then have the data file downloaded after it has been transmitted. You can access the file and your deleted messages once it has been downloaded. If the automated backup feature is not turned on in your account, restoring your deleted messages could be challenging.

Second approach: Third-party data recovery software

Using data recovery software is another method for recovering your deleted TikTok messages. While some of these apps might not be genuine, others are, and they can help you quickly retrieve any lost messages. You might use the TikTok Recovery Tool or the File Explorer software.

  1. Download the recovery app you want to use from the app store on your smartphone.
  2. Link your TikTok account to the app. To do this, enter your TikTok account information.
  3. Request the desired outcome, in this case, the recovery of your deleted texts.
  4. Depending on the app, you will be given advice on how to retrieve your deleted TikTok messages.

How to Prevent TikTok Messages From Disappearing

To guard against situations where your TikTok messages disappear, it is important to pay attention to the things that can lead to the disappearance, especially the ones that are under your control. In order to protect against losses that are beyond your control, make sure your TikTok data is regularly backed up.

Questions Frequently Asked For TikTok Messages Disappear

Do messages on TikTok vanish?

Why did my messages in TikTok disappear? Your TikTok messages disappear for a variety of reasons. After you start using the site actively, you might find that you can no longer access some of your messages.

Where did my message on TikTok go?

Your inbox contains all of your TikTok messages. All of your discussions are accessible when you open your email instead of Tiktok messages disappearing

Why am I not receiving any messages from TikTok?

It’s possible that a poor network connection is preventing messages from loading. It might also be the result of a server error. Make sure your connection is strong and try loading your messages once more.

Why don’t my TikTok messages appear?

Why did my TikTok messages disappear is a popular question asked: Your account cannot be made public if you are under the age of 16. As a result, you won’t be able to use features like direct messaging.

How can I get my TikTok messages?

You can use the TikTok data backup recovery option if you’ve lost your messages on TikTok. In the Personalization and Data area of your account, click Personalization and Data, pick Download Data, and ask for your data file to be provided to you to accomplish this. Go ahead and download the file to view your messages after they have been sent.

Does TikTok delete texts after barring someone?

No is the answer to this. If you were blocked, you can still access earlier communications you exchanged with the other person before being blocked. The same holds true for a circumstance in which you blocked someone. The messages can be manually deleted so that only you can view them.

Does TikTok delete DMs?

Do TikTok messages disappear? “If you remove a conversation or direct message, it solely deletes it for you,” the TikTok website claims.
With the right settings, a few problems that could prevent TikTok DMs from appearing in the inbox can be resolved include: set to be younger than 18. There is no entered or verified phone number. The privacy options are rather limited.

Conclusion – Tiktok Messages Disappear (How To Fix It)

Your TikTok messages disappear due to a number of factors. It could be due to a bad network connection, bugs in the TikTok app, a ban TikTok imposed on your account, being a minor, using an unreliable phone number, a new registration of your account, etc. Your messages must be backed up in order to provide a means of retrieving them in the event that they vanish.

Also, Read More Articles Apart from TikTok Messages Disappear – How To Fix It

How to Make Payment for Facebook Ads In Nigeria

How to Make Payment for Facebook Ads in Nigeria

When you wish to pay for your Facebook ad campaign, running Facebook advertisements in Nigeria can be difficult.

You cannot use your debit or credit card to purchase Facebook advertisements with the majority of Nigerian banks.

Additionally, paying for Facebook advertisements in Nigeria is challenging because of the CBN’s current expenditure cap on overseas transactions.

As a result, you cannot use your Naira Mastercard, Visa card, or Verve card to purchase Facebook advertisements in Nigeria.

Due to exchange rates, most advertisers in Nigeria today experience high costs when they pay for their adverts in dollars.

The return on investment from Facebook ads is therefore quite low.

You can also watch my step-by-step guide here on YouTube on How to make payment for Facebook Ads in Nigeria.

Table of Contents

Also, you may read other articles apart from How to make payment for Facebook Ads in Nigeria:

If you’re looking for information on:

  • How to pay for Facebook ads using your Naira Master or Visa card in Nigeria,
  • How to set up your Facebook Ads in Nigeria as a prepaid account
  • How to fund your ads account with PayU in Nigeria
  • Why your Facebook Ads card was declined
  • How to add money to your Facebook Ad Manager or Account
  • How to set up your Facebook Ads payment method in Nigeria
  • How to pay Facebook ads with a debit card, or how to pay Facebook ads using your debit card, then this article is for you.

See also: How to determine who is responsible for fake Twitter accounts

This is advantageous to:

  • Media buyers
  • Business owners and,
  • Digital Marketers.

Facebook Ads Account Types

Facebook advertisers have access to two different types of ad accounts:

1. Prepaid Facebook advertisements account; only after the ad account is funded can advertisers use this to run ads.

2. Postpaid Facebook Ads Account: This enables advertisers to run Facebook Ads and pay later, either at the end of the month or whenever they reach their billing threshold.

How to Use a Naira Debit Card in Nigeria to Pay for Facebook Ads

You may have had this issue if you are a Nigerian advertiser using Facebook Ads.

When paying for Facebook advertisements in Nigeria, the clients I advise frequently complain that.

After running Facebook advertising, they end up in debt. They can’t pay the accrued sum because their card was declined or they exceeded the $100 monthly cap on overseas purchases for most Nigerian debit cards.

I will share with you how to set up your ad account and create a naira account that allows you to use the local card payment option so that you can be grounded on how to make payment for Facebook Ads in Nigeria

You will discover how to set up your Facebook naira ads account and how to use your naira card to make payments for your ads.

However, if you currently have a dollar ads account open for Facebook advertisements, this will not work for you though there are other options for you.

As a result, you will need to set up a new advertising account.

Running your adverts in the local currency is the best course of action.

If you are in Nigeria, creating your Facebook advertisements in naira is fantastic since you only pay the precise amount you spend on running your campaign without any additional fees related to exchange rates.

This enables you to track the money you spend on Facebook ads accurately.

Nigerian advertisers’ problems with dollar Facebook Ads accounts (Facebook Ads payment failed)

  1. Banks impose limits on the majority of naira cards.
  2. Tracking the advertising budget used for Facebook Ads is challenging.
  3. The variations in the dollar-to-naira exchange rate bring about some unforeseen costs.
  4. Unable to run advertisements that exceed the CBN-mandated international spending limit set by banks in Nigeria
  5. Due to these drawbacks, many companies need help to run advertisements in Nigeria.
  6. They hire Nigerian digital marketing companies to help build and manage their Facebook ad campaign.

Also read: How to become an SEO Expert

How to Use Any Debit Card in Nigeria to Create and Pay for Facebook Ads

Before using this strategy, you must change the billing currency on your Facebook advertisements account to naira.

Facebook has made it incredibly simple to pay for Facebook advertising in Nigeria with your naira card by integrating the PayU Nigeria payment channel with the Facebook ads billing system (PayU Nigeria Facebook).

Log in to your own Facebook account.

  • and then touch “Add Payment Method.”
  • Then choose the local card, tap “Next,” enter the desired amount, and “Next” to finance your Facebook advertising account.
  • You will then be sent to the PayU interface.
  • Press “Continue.

You will then be redirected to a new page where you will be prompted to enter your credit card information. Click “Pay N4500.00 (the amount you want to fund with)” after you finish.

Choose the delivery option for your One Time Password (OTP), which will send a code to the phone number associated with your bank.

If you have the hard token option, you can also utilize that instead.

Click “Submit” after checking the box indicating that you agree with the information you have supplied. Enter the OTP delivered to your mobile device, then hit “Submit.”

How to Make for Facebook Ads In Nigeria - Advertising on Facebook
How to Make for Facebook Ads In Nigeria – Advertising on Facebook

If successful, you will see the word “Success” along with the new balance and the amount you added.

With this, you may operate a successful business in Nigeria while paying for your Facebook advertisements without any problem.

Additionally, see How to start a blog in Nigeria

FAQ about How to Make Payment for Facebook Ads in Nigeria

In Nigeria, how do I pay for my Instagram advertisements?

If you are running Instagram advertisements through the Facebook ads manager, you can also pay for your Instagram ads by following the procedures above.

How do I use PayU to pay for Facebook ads?

With the abovementioned procedures, paying for your Facebook advertising in Nigeria with PayU is now possible.

Why is my debit card not being accepted by Facebook?

If you use the local card payment option in Nigeria, your Facebook advertisement payment will most likely fail.

This is because cards are not allowed to be used for foreign transactions.

With the method mentioned above, you may create a Naira ads account and be ready to launch Facebook ads without worrying about the card’s expenditure limit being reached.

What are the lists of suggested bank cards for Nigerian Facebook ads?

The following are some of the queries we hear from companies we consult most:

1. Why isn’t my debit card being accepted by Facebook?

2. How to pay for Facebook Ads in Nigeria?

3. How do I add money to my Facebook advertising?

4. Can I use PayU in Nigeria?

5. How to pay for Facebook ads using Payu

6. How can I add a credit card to my Facebook account?

Here is the list of the bank that allow MasterCard on Facebook ads in Nigeria, based on my experience and the banks I have utilized throughout time.

  • Standard Chartered Bank Nigeria;
  • Zenith Bank MasterCard;
  • GTB Naira MasterCard;
  • Access Bank Visa card;
  • UBA debit MasterCard;
  • FCMB card;

You can use any of the banks on this list to pay for your Facebook advertisements in Nigeria if they accept MasterCard or any naira debit card like kuda card for facebook ads from your Facebook Ads manager.

Conclusion

I am confident that after following the above step-by-step instructions, you will be able to resume running your campaigns without encountering issues with bank spending limits or credit card rejection.

Suppose you want to work with a Nigerian digital marketing expert to manage your Facebook advertisements while you concentrate on other business operations. In that case, you can also contact Olubukola Agboola here.

I hope this was useful to you! Please share this post with your network without holding back so they too can know how to make payment for Facebook ads in Nigeria.

SEO Social Media Posts

Does SEO Social Media Posts Have An Impact On SEO?

My clients frequently ask me if publishing on social media improves SEO as social media marketing continues to gain prominence. If you keep reading, you’ll find out the answer to that question and learn more about how SEO Social Media posts can influence your SEO efforts.

Table of Contents

The impact of social media on SEO

Watch a video where I talked extensively on implications of SEO Social Media posts

Do SEO social media posts improve SEO and your organic rankings, then? In a nutshell, the answer is no. However, sharing pertinent links from your website on social media can help increase your website’s traffic and brand awareness. A survey by Hootsuite and We Are Social found that there are over 4.2 billion active users on social media platforms globally right now. This implies a sizable potential customer base for companies using social media. In conclusion, social media is a crucial component of any digital marketing strategy, even though it doesn’t directly affect SEO.

How SEO Social Media Activities Aid SEO

The time you spend on social media and the money you spend on SEO can benefit your online presence. Social media marketing helps SEO in a variety of ways, including:

Search Results May Display Social Media Profiles

Have you ever used a Google search for a brand and see social media profiles among the results? Certainly, I have! If you have a strong social media presence, people may find your profiles when they search for your company name or other pertinent terms. This may result in better visibility and more visitors to your website.

Bring in more visitors to your website and increase visibility.

As was already said, social media posts can increase website traffic. When you publish information on social media, it has the potential to be shared by your followers and potentially reach a bigger audience. This article’s link to your website can increase traffic and help you rank higher in local search results.

Consistent social media posting can also help you become more visible. With billions of users on social media platforms, the more posts you make, the more eyes there will be on them. Reiterating what was said earlier, having a strong presence on social media can help you rank higher for branded terms and make you more visible online.

Also Read: Does Domain Age Affect SEO & Google Ranking?

Greater brand awareness

Social media marketing also influences SEO by raising brand recognition. The more people start to identify your brand, the more channels you may have for it. So, if you post often on sites like Facebook, Twitter, and LinkedIn, to name a few, people will start to recognize your brand and use those terms to find you online. In the end, it can positively affect how much branded organic traffic comes to your website.

Increase the Posts’ Lifespan

The longer the lifespan of content, the more impact social media has on SEO. Let’s take the example of a recent article you published that was specifically seasonal—that is, it was about the winter season. When a year has passed, and you reshare the article link on your social media profiles, social media can assist in extending the life of this post and making it relevant. This makes the article useful again, even if it was published in the past, like a year ago in our example, and gives it an extra year of shelf life. Share the seasonal content on your social media networks at the time of year when it is most appropriate to utilize the same strategy every year.

Last but not least, social media can help you increase the number of backlinks to your website. For instance, the more places you share your article, the more people will see it. The more eyes your content receives, the greater the chance someone will see it and possibly link back to it. As you may well know, backlinks are crucial to any long-term SEO plan.

Even though social media is not a ranking factor for SEO, having a steady presence on social media and posting often can help your business in many ways.

What Are Backlinks From Social Media?
Any link that points back to your website from a social media platform is called a social media backlink. Social media hyperlinks can be added to user profiles, posts, and comments on websites like Facebook, Twitter, Pinterest, and Reddit and shared as direct links on social feeds.

Different Social Media Backlink Types
Text backlinks from Facebook, Twitter, and LinkedIn in posts and user profiles

Backlinks on user profiles on image-sharing platforms like Instagram and Snapchat
Forum backlinks in posts, comments, and profiles from Reddit, Quora, and Digg Videos with backlinks in descriptions and overlays from Youtube, Vimeo, and TikTok
saving links from Flipboard and Pinterest
Do Social Media Backlinks Count?
Social media qualifies as backlinks because a backlink is any link that points users back to your company’s website. Utilizing social media to create backlinks to your website will help your content become more visible and draw in more visitors.

Watch a video from Google Search central how pages from social media sites rank differently

5 ways to maximize SEO and social media

A question frequently asked is: “How to use SEO for social media?” Find below
Drive natural traffic
Increase awareness
Boost regional/local SEO.
Reach the material.
Increase brand awareness
Gain more backlinks.

Can social media be regarded as the new Search Engine

Social Media Posts as a search engine is more crucial than ever to optimize your content for platform search algorithms as more and more people use the search function on social media platforms.
It’s also a fantastic moment to prioritize short-form video content because it aligns with current social media trends and Google’s new Short Video Result Type.
The purpose of social media search optimization
In reality
Social media is used every day for an average of two hours and thirty minutes by 59% of people worldwide.
40% of Gen-Z preferred TikTok or Instagram to Google for searching.
Every day, Facebook receives approximately 2 billion queries.
Instagram users claim that 83% of the time, it aids in their product and service discovery.
Because these platforms keep users on the platform longer, social search can expand your social media following and website traffic.

Does SEO and Social Media Relationship Exist?

Posting to social media presents a fantastic opportunity to promote links to your company’s website, even though the relationship between social media and SEO isn’t strictly cause and effect. This increases website traffic, link sharing, and all the other amazing things that boost search engine rankings.

How does Social Media Help SEO?

It essentially works by increasing the traffic by making your brand and content more visible. Your social network accounts and YouTube videos also show up in typical search results. Making them search engine friendly would therefore unquestionably enhance your overall SEO strategy.

Also Read Other Articles apart from: SEO Social Media Posts

How To Get Canva Pro For Free

How to Get Canva Pro for Free and Without a Credit Card for a Lifetime

You want to know how to obtain Canva Pro without paying anything as a content creator, branding expert, or business owner.

You may save some cash each month or every year, which you could utilize for other purposes.

Canva is one of the most cutting-edge tools in the graphic design and branding industry for creating content for social media, websites, and infographics.

Occasionally, you may need to access Canva content only available to Pro users. You can learn how to get Canva Pro for free in this article.

A lifetime Canva Pro account is simple and easy to get. To get a free Canva premium, adhere to the detailed guidelines below.

You can open a free Canva Pro account for educators and students.

If you fit any of these descriptions and satisfy the requirements, Canva will grant you access to premium services.

The Canva for Education initiative offers Canva Pro at no cost to support education.

You can get a free lifetime Canva Pro account as a student or teacher. A.edu email address is required.

If you don’t already have one, I’ll show you how to quickly make one so you can use it to sign up for Canva premium for free. Sign up for free to have access to how to get Canva pro for free.

How Do You Use Canva?

Canva is accessible to everyone with an account. However, to use the features, you must create a Canva account.

If you are any of these under-listed professionals, you should learn how to acquire Canva Pro for free.

  • Business Owner
  • Graphic Designer
  • Branding Expert
  • A social media manager
  • Creator
  • Content Creator
  • Web developer/Internet development
  • Copyeditor, etc.

Account Types on Canva

There are two different sorts of accounts on Canva.

  • Canva Standard
  • Canva Pro •

What is Canva Basic?

There is no cost to set up a Canva Basic freemium account for any user. However, you cannot use Canva Pro features like assets, images, and videos with this account type.

Canva Basic can be used for free.

What is Canva Pro, and how to get Canva Pro for free?

The Canva Pro plan offers users premium photos, videos, unlimited storage, and assets, among other extra features.

You will have to pay between $1 and $20 for each asset if you don’t have a premium membership. But if you have a Canva Pro subscription, all premium assets are yours for nothing.

As a Canva Pro user, you have free access to the premium templates, videos, and images featured in the Canva library.

Additionally, view: The 15 Best Backlink Tools To Improve Your SEO Strategy.

How to obtain Canva Pro for life at no cost

By doing the following, you can create a free Canva Pro account that lasts forever:

1. Obtain a Temporary Email Address:

You must first get a temporary.edu email address to sign up for a free Canva Pro account. Then, check out the 10 Minutes Email webpage.

On this page, you can generate the.edu email address required to sign up for a Canva for Education account. Then, an email ID is instantly active and valid for 10 minutes on the dashboard.

Upon acquiring your temporary.edu email address, go to step 2. But if not, select delete from the menu. You’ll see immediately that a brand-new email address has been generated for you.

Reload the page until your temporary.edu email address appears.

The resulting Email will end with @edu.pl, as demonstrated below:

2. Go to Canva’s Education Page.

As soon as you have your.edu email address,

  • For access to Canva for Education, visit https://www.canva.com/edu-signup.
  • Type in your temporary.edu email address and select Email to sign up. You will receive Time Passwords (OTP) notifications in your email inbox.
  • After entering the OTP, click “submit.”

After confirming your email address, you have free access to Canva’s premium features. Congratulations! Free Canva Pro account for life.

3. Your Email Address Has Changed

You must replace the email address in your Canva pro account because.edu email addresses are only valid for 10 minutes.

To update your Canva email address, go to https://www.canva.com/settings/your-account and enter your current email address.

Do I need to get Canva Pro?

To avoid future service outages, purchase the Canva pro edition.

Since I’ve started using Canva Premium, I’ve saved a ton of Time.

This Time saved allows me to focus on three other areas that will enable me to make money. First, my investment was small due to my excellent ROI.

Go here to buy free Canva Pro lifetime. It is a Canva Pro Free Account free for days exclusive offer.

Canva Pro Free for Students: Where to Buy and How to Get Canva Pro For Free

Get a Free Student Canva Pro Account Right Now!

How to get Canva Pro for free is currently one of the most asked questions in the student forum.

Canva is one of the most popular online graphic creation tools. It is a free application that streamlines graphic design.

The Canva team aims to simplify the process of creating images as much as possible. In addition, students can now use their brand-new Canva Pro account.

Teachers, students, and educational institutions have access to a free version of Canva Pro.

Read this entire post if you want to use and know how to get Canva Pro for free as a student, teacher, or school.

If you aren’t a student, what happens? The website offers premium software called Canva Pro for a regular price of $12.99 for up to 5 users.

So without further ado, let’s begin.

How to get Free Canva Pro for Teachers and Schools (Canva Pro Free account)

Canva pro free for Educators is an excellent tool for K–12 teachers and their students because it is easy to use. In addition, it has robust editing features and is free.

This technology makes it simple for teachers and students to interact, create together, and visually communicate within and outside the classroom.

To invite your children to use Canva Pro for free for the rest of their lives, sign up here to become a teacher and have access to the Canva for education account.

Perhaps you are a member of the school administration; in that case, all you have to do is contact the Canva team and explain your situation.

After that, the Canva team will grant you lifetime access to Canva Pro via a unique URL. This URL will be provided to students who sign up using the invite link.

It is simple to get and straightforward to use and know how to get Canva Pro For Free.

How to Get Canva Pro For Free Students

You can acquire a Canva pro account for your time as a student. For the URL to the invitation, ask your teacher.

You will immediately obtain free access to Canva Pro for a student account when you sign up using the invite link.

As a result, to receive a Canva pro for kids account, you must be a student and have access to your teacher’s or school administrator’s computer.

For student developers on GitHub, Canva Pro is free.

To make their products available to instructors and students on GitHub, Canva and GitHub have teamed.

Students may get their Canva pro accounts for a year for free by using the coupon code STUDENT at checkout.

Consequently, you will get a free year of Canva Pro, a $119 value as a student.

You can be an expert in design by utilizing Canva. In addition, you may create professional graphics rapidly with the help of this efficient design tool.

You can use it without being a tech-savvy designer!

=> Sign up for GitHub.

=> Get the Student Developer Pack by enrolling.

You must first sign up for the program if you still need to get a GitHub Student Developer Pack (GitHub SD) account.

You now qualify for a one-year, cost-free student subscription to Canva Pro.

Can I Try Canva Pro for free if I’m not a student?

You can only access Canva pro free for students if you are enrolled in school since the invite link needs to be associated with a school.

This is good news. Canva Pro is still accessible for free. You can click on the button below to learn how to get canva pro for free.

FAQs on How to Receive Free Canva Pro Access for Life

How can I get Canva Pro for free without paying?

To obtain a Canva pro lifetime and use Canva pro for free, you must adhere to the directions given above. Before creating an account on Canva’s education portal, you must first create an a.edu email.

Students can use Canva Pro for nothing. How do I get Canva Pro for free as a student?

Yes, Canva is free to use for students indefinitely. However, for free access to Canva pro, you must provide an a.edu email address. Canva uses this process to verify that you are a student.

Using a hack, get Canva Pro for free.

To use Canva Pro Unlimited, you must have a student email and register on the Canva Education website. The steps for creating a.edu email address are listed above.

What does the Canva lifetime cost?

No Canva Pro Lifetime Deal exists. Canva deals are only available for monthly or yearly purchases by users.

Canva is accessible to me for free forever?

Can I use Canva free forever? Yes, you can get unrestricted access to Canva for life by completing the steps above. This is how to sign up for a complimentary premium account with Canva Pro.

Canva is a cost-free service?

Canva is not accessible. However, you can acquire a lifetime subscription for nothing. You can learn how to get Canva Pro for free and for life in this tutorial.

How to obtain unrestricted use of Canva Pro

Following the steps outlined above, Canva Pro can be unlocked for free. This is an easy way to obtain Canva Pro without paying anything.

The price of Canva Pro for students.

Canva Pro is free to use for students. However, to use Canva pro for students, you must enter a verified.edu email address.

What is the price of Canva Pro for educators?

How much does Canva Pro cost? Canva Pro is free for both educators and students. However, to obtain Canva pro for free as a teacher, you must provide an email address ending in.edu.

What is the price of Canva Pro for charities?

Canva Premium is free for nonprofit organizations. In addition, charities get unrestricted access to premium images.

However, you must meet the conditions to access Canva pro for free as a nonprofit.

What is the price of Canva Pro after the free trial?

Following the trial period, a single user of Canva Pro only $12.99 per month (or $119.99 annually). The starting price for a team of five employees is $14.99 per month.

However, if your team size is six or more extensive, you might receive a discount of up to 16% annually.

How much does Canva Pro cost for organizations?

The cheapest Canva business premium package is $14.99. If your team has more than five members, you can receive a discount of up to 16%.

What is the price of Canva Pro for college students?

Canva Pro is free for students at colleges. However, to use Canva pro for students, you must enter a verified.edu email address.

How much does Canva Pro cost annually?

Canva Premium costs $119.99 for an individual user and $149.90 for a team of five users a year.

Conclusion

To create outstanding designs, you must first have a premium Canva account. This article taught you how to get a free Canva Pro account. Click on the button below to learn how to get Canva Pro for free

Please distribute this info (How To Get Canva Pro For Free) on social media to those who might require it.

See also: More Articles Apart From How To Get Canva Pro For Free

Fake Twitter Accounts

How to Determine Who is Responsible for Fake Twitter Accounts

You could have come across shady or fake Twitter accounts in the past if you used Twitter.

Sometimes, the odd behavior of a few Twitter users can make you think that the account is real.

Examining the account’s ownership is helpful to tell if an account on Twitter is fraudulent.

You won’t have any trouble identifying the account’s owner once you’ve learned how it operates and who its owner is. A fake Twitter account checker can also help in this regard.

Keeping an eye on the user’s IP address and location is also possible to ensure the account is legitimate. Tools for monitoring IP addresses are widely available online.

Examining the account’s email address is another way to tell if the Twitter account is real or not.

It is a warning indicator that email addresses can provide you with a reliable indication of whether a Twitter account is legitimate or counterfeit or whether it is some fake Twitter accounts entirely.

This article will examine techniques for identifying fraudulent Twitter account owners or fake Twitter accounts.

It could be challenging to locate the owner of the secret Twitter account, though without the use of the fake Twitter account checker.

There are some telltale signs to watch out for to tell whether a Twitter account is phony.

You may learn how to spot phony accounts on Twitter from the information in this post.

So let’s go right to the basics immediately, without further ado:

Table of Contents

What Indicates Fake Twitter Accounts Is Fake?

There are a few warning indications to be aware of if you want to understand particular indicators of fake Twitter accounts on Twitter.

Making the distinction between fraudulent and real accounts is crucial. In this section, we’ll examine the bogus accounts.

Stolen Tweets – An Identifier for Fake Twitter Accounts

Having duplicate tweets indicates that an account is bogus. If the account frequently tweets the same thing, it’s probably a phony.

It is occasionally feasible to determine whether a user’s tweets and messages or tweets are identical. This suggests that this account is bogus, and it is.

It is not the best way to determine whether an account is authentic.

Image for Egghead’s Profile

This is typical. Twitter accounts without a profile photo are known as “eggheads.” Profile pictures are common for authentic accounts.

Some eggheads can result from account holders’ complacency or lack of attention to detail. They may occasionally be a result of bots. It’s up to you to make a decision.

Stock Photo of a Profile

Although having a profile picture of an egghead would be an upgrade, this is typically not the case with phony accounts or fake Twitter accounts.

They use profile photographs or stock photos frequently used by phony accounts.

No Bio – Another Identifier for Fake Twitter Accounts

A near-certain sign that the account you’re viewing is fake is the absence of a Twitter account profile.

This rarely used area is vital since it tells your followers (or potential followers) who you are and what they can get out of it.

Not having a bio isn’t just indicative of fun and suggests that the account might be unusual.

Uncertain URL/Handle Combo

This happens frequently. It’s crucial to pay attention to the URL and Twitter handle.

Now, if you look at the profile URL, it says “twitter.com/johndoe,” but if you look at the profile and the names in the bio, there is no link between the two.

You might encounter names like “Samuel Chuks,” for instance.

“John Doe” in the URL address is not related to this.

A nonsensical URL, such as “twitter.com/miklieshoooku,” is another red flag about the URL and Twitter accounts combo.

You can find out why the profile appears fake by looking up this URL. The address and the profile are unrelated.

While not every profile has a clear connection to the URL, the absence of words or phrases indicates that it was created using artificial intelligence and this can be tagged as Fake Twitter Accounts.

Unintelligible or Pointless Tweets Are Synonymous to Fake Twitter Accounts

Self-serving tweets are frequently used by fake Twitter accounts to advertise their brands. They may, for instance, publish links to their websites.

On Twitter, however, many phony accounts spread absurd or irrelevant views that nobody can comprehend.

Not Tweeting for a Protracted Amount of Time

Around the end of 2009, as Twitter gained popularity and momentum, some dishonest people started using technology to spam the site.

Today, things are better, as Twitter revised its API accessibility and policies to make it harder for malicious bots and automated processes to function.

When a Twitter account hasn’t written anything in a while or hasn’t tweeted in a while, the best way to tell if it’s fake is to look at its most recent tweet.

It shows that the account is not currently active.

See Also: Blogging For Beginners: Tips For Blogging For Beginners

Lack of Engagement or Interaction Depicts Fake Twitter Accounts

Rarely does a Twitter Fake account communicate with other accounts. Interactions are the lifeblood of social media. As a result, accounts that don’t engage in conversation are managed by bots.

Looking at recent tweets posted in recent days is a quick way to see if this account is active.

There’s a significant likelihood it’s operated by bots or is fraudulent if you discover there aren’t any @replies or retweets in their most recent 15 to 25 tweets.

Lack of Attendance or Few Followers

The fact that no one seems to be following it is another clear indication of a Twitter fake Account or a bot account.

It is commonly found in accounts with a user list of more than 2001. However, there aren’t many accounts that follow it.

While there are good reasons not to follow a particular false account, such as a bogus Twitter account, it could also be the case that the account has no value to anyone.

Every Twitter user is more considerate and can identify those deserving of a follow in return.

Being more involved and active and sharing engaging content with your fans are all ways to increase your following. Many users post humorous videos and memes to improve their followers’ engagement.

Unbearably Numerous Tweets – Usually From Fake Twitter Account Generator

Automation may be useful on Twitter if it is utilized responsibly and with common sense.

However, it is accurate to say that a phony Twitter account frequently posts an excessive amount of tweets, which is theoretically impossible for a human user to do.

For instance, you can come across a Twitter account with up to 110,988 tweets that have nothing to do with increasing followers. This is a red flag for a fake Twitter account.

How to Find a Fake Twitter Account’s IP Address

Twitter doesn’t make its users’ addresses available to the public. You can use web tools to identify which accounts are real and which are fake.

Using these programs, you can quickly and precisely discover an IP address for each Twitter account.

Once you start monitoring someone’s IP address, it’s easy to find out more about the account than just the address.

The IP Logger is a useful tool to help locate your account’s IP address.

Please take note of this detail, as it is essential for determining an IP address.

For instance, you may find someone’s IP address using the URL shortener Grabify or any other IP logger.

Here’s how you utilize the Grabify URL shortener to achieve this objective:

It would be best to use Grabify’s URL logger to begin tracking. URL logger by Grabify. Before you can monitor it, you might need to shorten the URL.

Copy the URL for the Twitter account you wish to follow. Then click the “Create URL” button after pasting your copied URL into the space provided.

The URL is then reduced to its final size, after which a tracker code is displayed. You can also search through the URL logs that you copied.

Utilizing the URL, you copied, visit Twitter. Please give it to the individual you think is in charge of a bogus Twitter account. Insist that they click the link in your URL. Visit the Grabify website next.

At this point, clicking the abbreviated URL will display all of the user’s information.

Grabify has access to the user’s IP address and other details, such as the user’s device and browser, that may interest you.

Visit the Tracking Code portion of the Grabify website and choose the pop-up that appears.

Following your selection of the tracking code Once you’ve chosen the tracking code, it will supply you with all the necessary information and specifics about the user you’re tracking, including their location and the hostnames of their device, ISP, and other important information.

FAQs on How to Spot Fake Twitter Accounts

What should I do if I want to report some fake Twitter accounts?

Twitter requests that users report accounts that impersonate others or use false names.

You can contact Twitter with a complaint if you believe a specific account is not absolute and are disturbed by it. This is how:

Go to the report page on Twitter to get started.

After that, select “An account is impersonating me or someone else.”

After selecting “An account asserts to be or represent my organization, company, or brand,” you will be prompted to choose from several options as to why you are filing the report.

• After providing further information, click the “submit” button.

• Using the email address you give, you will receive updates with information on your reports. In addition to reporting bogus or fake Twitter accounts, you can also report tweets that irritate or threaten, insult, or verbally abuse you.

• Twitter’s goal is to offer a comfortable setting where you can be yourself.

Are law enforcement authorities able to identify phony or fake Twitter accounts?

Absolutely. When they participate in illegal or hostile acts, law enforcement officials can keep an eye on all fictitious profiles on Twitter.

Do you post your contact details on Twitter?

Yes. To access Twitter, go to twitter.com. Click on the settings in the lower right corner of the page. You will then be directed to the data and personalization settings. After that, you can download your Twitter data.

Conclusion

This article describes how to use Grabify Logger to locate the IP address or determine who is operating phony fake Twitter accounts.

We also looked at how to tell fake Twitter accounts from real ones. Use the share button below to let your loved ones and friends know about this post.

Also Read:

How to Use Google Search Console in 2022

Learn How To Do an In-Depth Technical SEO Audit in 9 Steps

34 Benefits of SEO Optimization to Your Business

I want to become a blogger – Take these immediate steps after you start a blog

How to Create Business Page on Facebook

How to Change Date on Facebook Post in 2022

Create Business Page on Facebook

How to Create Business Page on Facebook

Facebook is the most popular social media platform. The Facebook platform, which has over 2 billion users, is a fantastic tool for business marketing. A business page is one of the best ways to maximize Facebook for business expansion. A Facebook business page can be a powerful business accelerator. The question of how to create business page on Facebook is expected. This article will address precisely this question.

You will also find relevant information about how to create a Facebook Business Page step by step and tips for positioning your business page on the platform.

Getting certain things in order is vital before you launch or create Facebook Business Page Account. Using the Facebook business page tool will give you an advantage over competitors.

Table of Contents

Pre-Setup Tips to Create Business Page on Facebook

Before you create your business page on Facebook, learning one or two things that will make your brand stand out is essential.

Before you create a Facebook business page step by step for your business, continue reading to learn about the things you should do before you create new FB Business Page.

Goals on How to make Facebook Business Page look Professional

Before you take the step to create business page on Facebook, it is essential to define your goals clearly.

The platform is full of many activities. It is easy to get distracted.

Setting goals for your page is one way to avoid distractions. Goals will help you stay focused and provide a framework for evaluating your achievements.

It will tell you if you are moving forward or not.

The Pattern to Create Business Page on Facebook

Choose the layout at which the page will be run.

You should study the culture that has the most success in running pages with the type of services you offer.

You will be able to identify the demographics that can improve your page’s positioning on how to create Facebook Business Page on Mobile.

Management

To increase traffic to your site, you need to manage it properly. You can either learn how to ensure the page runs smoothly or hire someone to order it for you.

Knowing when to post, how to create great content for marketing, and how to maintain consistency in content delivery is essential. It is vital.

Once these are completed, you can start to create new FB business page.

When you want to create Facebook business page, there are some things you should know. Let’s take a closer look at these.

You can also learn How to change Date on Facebook Post in 2022

Setting up how to create Business Page on Facebook

Create Business Page on Facebook

Create Facebook Business Page Account

Without an account, you cannot create Facebook Business page.

The first thing you need to set up a Facebook business page is to have a Facebook account. It is easy to learn how to create Facebook Business Page on Mobile.

Register with either an email address or a telephone number. After signing up, you’ll need to enter the required details, such as your name, birth date, and other pertinent information.

Next, launch and create new FB business page.

Category

Setting up your business at a generic level will not be as beneficial as being specific about what service(s) it provides.

When creating your business page, be sure to choose a category. There are three categories you can use for your Facebook Business page.

You only need to choose the primary category and any other related categories.

The Benefits of Choosing a Category When You want to create new FB Business Page

  • You can give your new FB business page specificity by using categories. This gives your Facebook Business page a unique look. This will allow you to include the category information of your business beneath your business name. This is your first advertisement for the company.
  • Your business will be more visible to the public if you select a category. Your page will appear in search results when someone searches for your type of business. If your business is near the user, it will be displayed in search results.
  • If your page falls under a particular category, users will recommend your business page to others who will likely need your services.
  • Similar pages can be organized into categories for users to browse.

Visuals: How to make Facebook business page look professional

To promote your page, you need to have great visuals. Low-quality photos will not only misrepresent your brand but also won’t attract top-profile customers.

Good cover photos will help you get people’s attention and make your Facebook Business Page look professional.

Description

A well-written description of your business is essential when you are creating a new FB Business page. These should sum up the what, why, and how of your business in simple terms.

Your description should be concise and beautifully written.

Contact

Make sure your new FB business page contains information about how people can reach you. It is better to have contact information that is more professional than personal. It’s safer.

Location

If your business is physically located, you can add information about the address and hours of operation.

Follow the below steps to learn how to create Facebook Business Page on mobile device or a personal laptop.

You can also see A Comprehensive Guide on How to Delete A Facebook Pixel

How to create Facebook Business Page on Mobile

If you don’t have a Personal Computer, you don’t have to feel restricted. You can use your phone to create Facebook Business Page Account. Follow the steps below.

  • You can launch the Feed from your Facebook account.
  • Click the Pages icon to open the Pages section.
  • To add a page, click the “+Create” icon.
  • Clicking on “Get started” will start the page creation process
  • Type the name and categories you would like to use for your page.
  • To move to the next step, press “Next.” You will be asked for an address. You have two options: skip this step or continue to the next step.
  • Next, click “Next” to add a profile picture and a cover. Select a style that will make your page stand out.
  • To complete the process, press “Done.” Voila! Voila! Your mobile phone has created your page.

How to create Business Page on Facebook for PC

You can create Business Page on Facebook with your computer. Here’s how:

  • Use a web browser to make your Facebook account.
  • Press the Pages icon in the upper right corner of the homepage.
  • Choose the Create a new page option.
  • Type the name and categories of your page.
  • Other relevant information should be filled in.
  • Click on “Create a page.” Next, you can add a profile and cover pictures to your page.
  • Once you’re done, click “Save.” This will take you to the new page.

FAQs How to Create Business Page on Facebook

I can’t create Facebook Business Page Account.

When creating a Facebook Business Page Account, it is possible not to find the Pages icon in the Feed. Tap on the menu icon. Tap on the menu icon to display the options. To continue the creation process, tap on the “Pages” button.

Will my account details be available on the business page I created with the account?

Although you created your page using your Facebook Account, your personal information is not required to be displayed on the page.

Your account details will not be visible unless you have entered them on your page.

Conclusion

Create Facebook Business Page to increase your social media reach and customer base.

You can make your page stand out by being specific about your offer and using stunning visuals and rich content. If you manage your Facebook business page well, the benefits of having a business page are immense.

Also read:

How to change Date on Facebook Post in 2022

A Comprehensive Guide on How to delete a Facebook Page

The 20 Best Free SEO Tools for Online Businesses

Top 15 Essential Digital Marketing Skills to Acquire in 2022

Benefits of AI on Social Media Marketing

Change Date On Facebook Post

How to Change Date on Facebook Post in 2022

Many Facebook users don’t know they can change date on Facebook post. Facebook allows you to backdate posts already in progress.

If you want, you can restrict Facebook’s display or promotion of your post in your news feed.

This article will cover everything you need to know on how to change date on Facebook post, as well as other ideas related to Facebook pages or post scheduling.

These are the questions we will be answering in this article:

  • Why is it important that a Facebook page’s date can be changed or modified?
  • What is the best way to change a Facebook post’s date?
  • Is it possible to set a date expiration for Facebook posts?

Let’s start without further delay!

Table of Contents

How to change date of Facebook post?

Change Date On Facebook Post – Backdate Post

You can change the date of a Facebook post to “backdate,” i.e., alter the post date to previous dates that are not the current publishing time.

This is useful if your goal is to create a new profile or Facebook page, but you want your friends and fans to think you have been there for a while.

Facebook allows users to backdate and update Facebook posts as soon as they are being shared on their feed.

It is not possible to backdate posts via your Facebook profile. This feature is only available for the Facebook business page.

If you’re ready to backdate any posts on Facebook, the best step is to create a Facebook business page to be a media personality or influencer.

See also: A Comprehensive Guide on How to Delete A Facebook Pixel in 2022

How to edit Facebook posts before publication

This is the best way to make Facebook posts editable before they are published:

  • Log in to Facebook.
  • Visit the Facebook page.
  • Navigate to the publishing section in the upper left corner.
  • Navigate to the FB publishing tool, and click on “Creator Studio.”
  • Next, click on “Create post” to start writing your post.
  • Click the arrow button to select the “Share Now” option.
  • Tap “Backdate.”
  • Next, set a date for the Facebook post you wish to update.
  • Select “Backdate” after you have set the date and time.

The Facebook post will instantly be backdated. It will appear on your Facebook page.

Modify the date of an already published Facebook post

If a post has been published on Facebook business pages, the user can backdate or change date on Facebook post even if it has been published.

This step will help you to do that:

  • Navigate to Facebook, and you will see a list of posts.
  • Go to the post on Facebook if you wish to modify the date.
  • Click the hamburger icon in the upper right corner of the post.
  • Select “Edit Date” from the menu.
  • You can edit the publication date and time at this stage.
  • After you are done, click the “Done.”

Viola! Your Facebook post has been successfully edited to change the date and time.

How to add an expiration date to your Facebook post

Let’s say you have an eCommerce store on Facebook. How can you offer limited-time coupons for your customers?

Facebook has a useful feature that allows you to add an expiration date for a Facebook post so that it doesn’t appear in your news feed.

This will help prevent confusion and make your page more organized.

Here’s how you can add an expiration date to your Facebook page.

This link will launch the Facebook creator studio. You can also access your Facebook page.

On the left panel, select “Publishing Tools.” Next, click on “Creator Studio” in the left-hand corner of the screen.

  • After you have accessed Creator Studio, click the “Create post” option.
  • Next, create your Facebook post. However, instead of selecting the blue “Share Now” option, choose the “Share Now” option with an “arrow.”
  • Select “Schedule” from the menu. This will allow you to schedule your Facebook post.
  • Next, click on the “Stop News Feed Distribution” option. Click the option to add an expiration time and date to your Facebook post.
  • After adding an expiration date, choose the “Schedule.”

Remember that Facebook posts will not be deleted or varnished after the expiration date expires.

If they visit your business page, their followers can still access the post. The post will not be visible in the News Feed forever.

You can also see 3 Powerful Online Marketing Strategies For Small Business

How to schedule a Facebook post on a PC

These steps will allow you to schedule a Facebook post from your desktop.

  • Access Facebook from your computer via your web browser. Navigate to the left-hand panel, and you will find your business or community page.
  • Select Publishing Tools from the left panel.
  • Click the blue-button to create a post and then add it.
  • Click the arrow next to the publish option and “Schedule Post.”
  • Add the date and time for the post-publication to the lower right and click “Schedule.”

How to schedule a Facebook post on Mobile

You must install Facebook Pages Manager if you’re using a smartphone.

  • Go to your page and click on the “Post” option. It is colored grey. Select the jagged line at the lower part.
  • Next, click on the Create post option.
  • Write your post, then click “Next” in the upper-right corner.
  • The “How do I want to publish it?” button will appear. Your post is already set as default. Click the button and select “Schedule.”
  • Find the “change scheduled hour” field and enter the time and date you want to publish your post.
  • In the upper right corner, select “Schedule.”

How to access and edit scheduled posts on Facebook via your PC

Many Facebook users are faced with the problem of not being capable of updating their scheduled posts.

Here’s how it works:

  • Navigate to the business page and select Publishing Tools from the left panel.
  • Select Scheduled posts to access a list of all planned posts. You can then click on the post that you want to edit.
  • You can use “actions” to post immediately, reschedule or remove posts, and many other things. You can modify the content of your scheduled posts using the hamburger icon (…). This includes pictures and other important information. Click the hamburger icon to schedule the post for a later date.

How to access and edit scheduled posts on Facebook via Mobile

  • Launch the Facebook Pages Manager app on your smartphone and choose the tool item in the lower right.
  • Tap Scheduled posts on the Sharing Tools option.
  • To reschedule posts at a later time, click the hamburger icon.
  • The reschedule option for posts is only available to smartphone users. You will need a web application to update any post’s content.

You can also see How to Use Google Search Console in 2022

How can I schedule a post on a Facebook Group?

It is easy for group administrators and moderators to schedule posts in Facebook groups. Go to your group page, and click “What’s On Your Mind. ” To add date and time, click on the calendar icon. Next, click “Schedule.”

How can I schedule a post on Facebook using a phone?

  • Start the Facebook mobile app on your smartphone.
  • Navigate to the group page.
  • Click the schedule option. Next, click the slider to activate “Schedule Post.”

How to edit, delete, or schedule group posts on Facebook

  • Access your group page to update your Facebook group post.
  • Start Admin Tools and choose Scheduled Posts.
  • Tap the hamburger icon (…) to edit the content of your posts.
  • You have three options: Delete, Edit, Post now, or Reschedule.

How to Change Date on Facebook Post FAQs

Can I backdate a Facebook post?

Here’s how you can change date on Facebook post.

  • Log in to Facebook with your password/email address/password.
  • Navigate to the top of the page, and click on the “Posts” tab.
  • Select “Create new posts.”
  • Enter the date and time you want to backdate the post on Facebook and click “Post.”

Can I change date on Facebook post?

Select the post to edit or change the date. Select the hamburger icon in the lower corner. Navigate to Edit Post, then choose the date you wish to edit.

You can also see 5 Reasons Why People Are Afraid of Google SEO

Can I retrieve an old post from Facebook?

You can retrieve expired posts from Facebook easily. Navigate to the Activity Log to search for the post you are looking for. Click the small arrow at the top right and click “Download.”

Facebook has tagged my post as “expired” Why?

There are many reasons this could happen. You could have set a time limit to prevent the post from being visible forever.

The post will still be visible on the user’s timeline as long as it has not expired. If the post has expired, it won’t appear on your Facebook timeline.

Another possibility is that your post was removed because it violates Facebook’s community standards.

What does “Facebook post expired” mean?

This could indicate that the post was removed by the owner or disabled by Facebook because it violates its user agreement policy.

Conclusion

This concludes the tutorial on how to change date on Facebook post. You must ensure that you are properly logged into Facebook before making any changes to your post.

You can only backdate a post through a business page. Good luck on how to change date on Facebook post!

Also read:

Ways to Secure Your WordPress Website

Benefits of AI on Social Media Marketing

Top 43 Lucrative Business Ideas In Nigeria To Start

Benefits of AI on Social Media Marketing

Benefits of AI on Social Media Marketing

There are numerous advantages and benefits of AI on Social Media Marketing for businesses. This integration has the ability to bring together powerful synergies to make effective and effective strategies for the digital world.

It is also the case that there are currently a variety of social media campaigns powered by the use of artificial intelligence into them.

Mixing AI with social media offers a variety of advantages for businesses that collaborate with them.

It is widely known that social networks are the most effective channel for communication for the company and its client as they facilitate direct communication to the people who are the target and make brands more human.

With the capabilities that AI can bring to this one, it is possible just to automate various tasks, like lead management or customer service but also to realize one of the primary objectives of strategies for social media which is customer loyalty.

Remember that AI is among the most rapid-growing technologies in recent times. The future of AI in Social Media and the benefits of AI on Social Media Marketing.

According to the Exploding Topics report, the Artificial Intelligence market will increase at a Compound annual growth rate (CAGR) at 40.2 percent between 2021 and 2028.

In reality, AI is known as an important technological advancement to help in the online marketing of the future.

Other benefits of AI on Social Media Marketing is that Artificial Intelligence Pursues the Humanization of the Machine

Artificial Intelligence is a type of technology that mimics all functions that humans might perform, like understanding external and internal data and then learning from it through Machine Learning, and, from that, generating their own information.

Then, that information can be utilized in different areas and benefited from it.

Table of Contents

One of the main features of AI include:

  • Allows autocorrecting.
  • Let’s you understand the natural language.
  • Can identify patterns in data.
  • Finds out if there is fraud.
  • Recommends certain products.
  • Understands sentiment.
  • Identification of vital details.
  • Learning from experiences and situations.
  • Troubleshooting and recognizing problems.
  • Automated responses to users

Integrating AI will allow users of social media campaigns to go beyond just interaction with users to develop a more authentic relationship with them, establishing the trust factor which is crucial in the world of digital.

This is feasible because AI can automatize certain tasks currently performed manually, including customer care, lead collection or even finding fraud. These are among benefits of AI on Social Media Marketing.

This allows brands to allocate greater of their time and energy to activities that are more crucial, but as well to provide the user a better experience.

Furthermore, artificial intelligence can help brands understand the opinions of their customers which is to determine if they are happy with the service or product they provide.

This kind of information is crucial because it helps brands understand the areas of their products or services which are in need of enhancement.

How Can Brands Use AI in Their Social Media Campaigns

AI is becoming more popular in the world of digital marketing because it provides a variety of options, including the following:

AI Writing Tools

AI writing tools are rapidly growing in popularity. They are instruments that use artificial intelligence to assist writers to write better marketing material. Some of these tools include:

Grammarly This is software that allows you correct grammar errors and detects plagiarism. It also provides tips for improving your writing as one of the benefits of AI in Social Media Marketing.

Jasper: This can be described as the most sophisticated writing tool which makes use of artificial intelligence to assist you to write content.

It comes with a variety of options, including the ability to make use of the voice command feature, an internal plagiarism detector, a built-in grammar tool, and much more benefits of AI in Social Media Marketing.

There are AI tools that allow you to create more appealing images to use in your Social Media campaigns, for example:

Canva is a tool for designing graphics that give you a range of designs for Social Media graphics. This can also be categorized as a tool used as benefits of AI on Social Media Marketing

Pablo: The Pablo tool developed by Buffer allows you to design images that can be used on Social Media in a matter of seconds.

Chatbots

Chatbots can be described as computer software that simulates human conversation. They can be used to automate the customer service processes.

They permit you to:

  • Respond to more customer service queries in parallel.
  • Provide around-the-clock customer service.
  • Be able to have a conversation with your customer.

No doubt, Chatbots benefits of AI in Social Media Marketing.

Generate Leads

The lead capture process is the procedure of capturing the contact information of prospective customers.

It is possible to do this by a variety of methods like submitting an online form or asking for information on social media.

AI can help you to:

Make it easier for taking leads.

You can tell when a person is attracted to your product or service. You can tell when a potential customer is interested in your product.

Recommend products to customers.

Learn to understand the mood of users.

Digital Marketing

The goal of every advertising campaign on the internet is to build the customer’s loyalty. That’s one benefits of AI on Social Media Marketing

AI can help you to:

Automate the tasks typically performed by hand.

  • Create leads.
  • Know the user’s mood.
  • Provide better customer service.
  • Detect fraud.
  • Know the user’s behavior.

All of these capabilities allow companies to gain a greater knowledge of their consumers and, as a result, come up with more effective strategies for marketing that are more in tune with the requirements and wants of their targeted customers.

One of the benefits of AI on social media marketing networks is the fact that they can provide the possibility of predicting how people will react to a specific advertising campaign.

Determine the possible behavior of customers on the Internet as well as on social networks.

Chatbots which are used in customer service is increasing in importance and independence in the process of making decisions.

They customize advertising to meet the needs of each client or user by studying their behavior experience within an application or software.

Artificial intelligence is able to make use of the vast amount of data customers share on digital platforms such as social networks as well as the internet.

The data is processed to enhance the strategic decision-making process.

It is because AI can automatize numerous tasks that can be optimized for marketing activities online.

Automated learning algorithms permit the categorization and classification of posts on any social media platform about every user on the planet.

A brand can’t control the content of competitors’ publications, or the current trends.

This is why it is important to be capable of analyzing and categorizing the most relevant topics to an individual target audience.

Benefits of AI on Social Media Marketing

It’s quite common when you are browsing on social networks ads start to show up which are in accordance with the user’s preferences or browsing past.

This is as the AI has identified the things you’re looking for and has suggested products or services that are related to it.

In this manner, AI increases the chances of reaching a wider audience. AI improves the possibility of reaching a wider audience. Other benefits include:

1. Easily Manage Lots of Data

The huge quantity of data and information that is gathered through social networks today renders the control of data by humans impossible. This is why AI can help you manage it, analyze and categorize this information, and then convert it into information to develop innovative campaigns as well as new digital advertising strategies.

2- Predicts User Behavior

It’s extremely difficult to predict the behavior of users. But with the benefits of AI on social media marketing, it becomes possible to predict the way a person reacts to a particular item or service.

3.- Understand Customer Needs

AI helps you understand the desires and needs of customers to more a degree than what is possible through traditional analysis.

4.- Benefits of AI on Social Media Marketing – Improved Targeting of Ads

With AI it’s possible to target ads more precisely, increasing the likelihood that potential customers will see them and become attracted by the service or product being presented.

5.- Generate More Interactions

One of the benefits of AI on Social Media Marketing is that it aids users on a site or social media site to access the information they require.

Thus, it permits users to spend more time connecting to a website that has a name and improves the likelihood of conversion by making effective use of a CTA.

This increases internet traffic.

In short, social media which use artificial intelligence often offer a higher amount of quick and simple user responses, which decreases the time it takes to deliver information and wait for news or updates.

This is evident to users as they experience an overall more enjoyable user experience.

6.- AI and Networks Are Better Adapted to Audiences

With the huge accumulation of data created by artificial intelligence in social networks, it’s possible to tailor every piece of content according to the previous experience of every user.

The data you have included are results of your searches and the interactions you’ve experienced as well as the remarks you’ve made or posted, etc.

All of this information can be incorporated into a bigger picture which then aids in creating the most effective marketing strategy for the particular customer.

For instance, if you enjoy the image of a car, then surely algorithms and AI will display additional car pictures to the individual.

7.- Minimize Human Error on social media

There is no way to be perfect, and mistakes are possible when collecting customer data.

Utilizing AI can be greatly reduced since it’s an automatic process.

8.- Continuous Learning

AI never ever stops learning. It is a fact that the bigger information it can access the more adept it gets in comprehending human behavior and human needs.

Shortly, AI can offer many advantages in marketing via social networks. marketing.

With the help of AI, an organization can gain insight into their clients that would be otherwise impossible to collect.

This data can be utilized to create highly customized content that will increase traffic and interaction to the web.

In addition, AI assists businesses to reduce time and costs as well as provide an improved user experience.

Social networks that use AI are very well-adjusted to their audience and are always developing and learning.

As a company, It is essential to stay up-to-date with current trends and technologies and making use of AI to aid in social marketing on the internet is an excellent option to accomplish this.

Conclusion

The use of social media for marketing can be a fantastic method to get in touch with your customers and establish a connection with them.

But manual work can be time-consuming and complicated.

AI has many advantages in the field of the use of social media for marketing.

It allows businesses to gain details about their customers which is otherwise difficult to acquire.

The information is then utilized to create highly customized content that will increase traffic and interaction on the internet.

It’s not just that, AI can also help businesses reduce time and costs while providing an improved user experience.

Social networks that use AI are well-adjusted to their audience and are always developing and learning.

For a business as a business, it’s important to stay on top of the most recent trends and technology making use of AI to promote social media is a fantastic method to achieve that.

Have you got any concerns about how AI can aid in marketing on social networks marketing? Drop a comment below!

We’d love to hear from you about your ideas

How to Delete a Facebook Pixel

A Comprehensive Guide on How To Delete A Facebook Pixel In 2022

How to delete a Facebook Pixel

If you’re wondering how to get rid of the Facebook pixel now, you’re on the right track!

There are many reasons you could decide to find a means of how to delete a Facebook pixel. It could be because you don’t have access to the Pixel installed on your site and would like more control over it.

Or you have multiple pixels on your website, and you wish to reduce the amount.

Whatever the reason, it is your sole responsibility as a website owner to know how to delete a Facebook pixel in 2022.

There are various ways to eliminate the Facebook Pixel. However, I’ll tell you the way quickly and without any hassles.

Let’s start.

Table of Contents

What is a Facebook Pixel?

The Facebook pixels are a small invisible piece of code that is embedded inside the HTML of your site.

It lets you track the actions that users take on your website. This means that you can track which pages they’re engaging in, the things they click on when they visit your site, the pages they click on, and the amount of time they spend on your website.

This lets us make educated decisions on how to assist your customers best and improve conversion rates.

How to Delete Facebook Pixel From Business Manager?

With the recent changes to Facebook Business Manager, businesses cannot remove the Facebook Pixel entirely out of your Business Manager.

However, you can take it from an account that you don’t want to see it on, block access to specific individuals, or even change the name of the Facebook pixels.

To take away the Facebook pixel from your ads Account, follow these steps:

Log in to your Facebook account and go to the business manager by visiting https://business.facebook.com/

Go into your Business Settings.

Click Data Sources. Then tap Pixels. Then you will see all the Facebook pixels and ads associated with your Account.

On the right side of the screen, click on the top right tab, “Connected Assets.”

Then you will need to look over that Facebook image you want to remove and then click”Trash.

Then then, finally, click “Confirm to remove the pixels.

That’s it. You’ve successfully removed this Pixel from the advertising account.

How to Delete a Facebook Pixel From Website

The most efficient method of deleting a Facebook pixel is to eliminate it from your site simply.

This means that you won’t have to remove this Pixel on the Facebook end because it no longer transmits your Pixel data from your site to Facebook.

It is essential to identify the exact pixels on your site’s header, which is the Pixel you’re looking to remove, especially if there are several pixels.

The most efficient way to determine which Pixel is appropriate to remove is to look up the Facebook Pixel ID.

There are four methods to add the Facebook Pixel to your site:

Manual Installation by a Web Developer.

Manual pixel installation with third-party plugins such as Insert Header and Footer.

Partner Integration occurs when you use some of Facebook CMS partners such as WooCommerce, Joomla, Shopify, WordPress, Magento, etc.

Manual Installation using Google Tag Manager.

Deleting Facebook Pixel Installed Manually

To manually install a Facebook pixel, you will need to delete the base code from your website’s header or delete any third-party plugin.

You can look for the base code for the Pixel to verify that it is placed on your site by visiting your site and using the feature to view your page source to verify the sources code (Press CTRL+U in Windows and Command + U for Mac).

Then, search using the Meta pixel text. If the Pixel is in use, you’ll be able to see something similar to the following:

How to delete a Facebook Pixel Manually

You can also use the Facebook Pixel Helper to find the ID of the Facebook pixels you’d like to erase.

Alternately, you could ask a Web Developer to help you eliminate the pixels.

Delete Facebook Pixel Code From Google Tag Manager

If you’ve installed the Facebook Pixel using Google Tag Manager, you must remove it from the container. Google Tag Manager, you must remove it from the container which creates the Facebook event on your website.

You don’t have to be the person who created it to get rid of the tags associated with this Pixel. Facebook pixel.

If the person who installed it followed the guidelines of the naming convention, then you should be capable of locating this device and block that it isn’t firing.

Just press the tags and verify if they’re identical to Facebook Pixel base codes. Facebook Pixel base codes.

The Tag can be found by logging into Google Tag Manager. Log in to Google Tag Manager and click on Tagsunder your workspace on the left menu.

Choose the Tag which represents the Facebook Pixel. Then, tap your finger on the Facebook Pixel Tag you wish to erase.

If you tap the Tag, it’ll display and allow you to edit it. You can either pause or remove the Tag by tapping the three dots in the upper right corner.

If you choose to delete or even pause the Tag, save your changes to prevent the Tag from firing. For the best results, put the Tag on pause first to ensure it no longer fires before you delete it.

You will be able to ensure that you haven’t deleted the incorrect Facebook Pixel tag.

You can also use the Facebook Pixel helper to obtain the ID of the Facebook pixel you would like to remove.

You can also ask a Web Developer to help you eliminate the pixels.

Delete Facebook Pixel Code From Google Tag Manager

If you’ve installed the Facebook pixel with Google Tag Manager, you must remove it from the container. Google Tag Manager, you must remove it from the container which creates the Facebook event on your website.

You don’t have to be the one who set up the system to get rid of the tags associated with this Pixel. Facebook pixel.

If the person who installed it followed the naming convention guidelines, you should be able to find this device and block that it isn’t firing.

To verify how to delete a Facebook pixel, tap the tags to verify if they’re similar to those of Facebook Pixel base codes.

When you log in to the Google Tag Manager, you can locate the Tag when you log in to the Google Tag Manager and click on Tagsunder in your workspace’s left menu.

Select the Tag which represents the Facebook Pixel. Then, tap to delete the Facebook Pixel Tag you would like to remove.

If you tap this, the file will display and allow you to edit it. You can either pause or remove the Tag by tapping the three dots in the upper left-hand corner.

When you choose the delete button or pause, save the changes to cease the firing of your Tag. It is recommended to stop the Tag from checking if it is stopped firing before deleting it.

You will be able to ensure that you haven’t deleted the incorrect Facebook pixels tag.

Delete Facebook Pixel With Partner Integration Set-Up

If you’ve set up your Facebook Pixel using the method of partner integration, You can erase the Pixel. How to delete a Facebook Pixel can also be done through the Facebook Partner Integration

For example, if you have previously used Shopify, you can simply visit your Shopify backend to delete the Facebook Pixel ID.

To accomplish this do this, follow these steps:

Log in to your Shopify administrator dashboard.

Tap on the Online Store.

Then, select Preferences and scroll to where you’ll find Facebook pixels.

Take out the Pixel ID.

Last but not least, save any the changes.

That’s it. The Facebook Pixel will cease firing on your site.

How to Delete Facebook Pixel From WordPress

Based on the way you put your WordPress Facebook pixels on WordPress and how you removed it, the steps to get rid of them could be different.

To erase Facebook Pixels that are installed using this WordPress Partner Integration, simply follow the steps listed below:

Log into your WordPress admin dashboard.

Go to the plugins.

Look for the Facebook Pixel plugin that has been installed.

Remove the plugin

That’s it. It’s that simple. Facebook Pixel will cease firing on your site.

Follow the steps below to remove Facebook Pixel installed by Google Tag Manager on WordPress by using Google Tag Manager.

Log into Google Tag Manager. Google Tag Manager.

Go to your workspace, then click on Tags at the bottom of the menu.

Next, you must select the pixel tag you wish to remove.

When it is opened, it will allow you to delete or modify your Facebook Pixel Tags.

You can stop it to ensure you are in the FB Pixel you want to remove. Afterwards, tap on delete.

Make sure you confirm it and save the changes.

Log into Your Shopify Admin panel.

Tap on Online Stores.

Click on the Preferences.

Within the Facebook Pixel section, click to change the Facebook pixel.

Then, you can delete your Facebook pixel.

Then you can click “Save.”

How to Delete Facebook Pixel From Squarespace

If you want to learn how to delete a Facebook Pixel from Squarespace, It’s easy to erase Facebook Pixel from Squarespace. To do that, follow the steps listed below.

Log in to your Squarespace administrator dashboard.

Navigate to Marketing.

Then, click Facebook Pixels & Ads.

Click to remove your Facebook Pixel ID.

Finally, tap Save.

How to Delete Facebook Pixel From Wix

If you’re using Wix, you can learn how to delete a Facebook Pixel by just following the steps below to erase Facebook Pixel

 Log into the Wix Dashboard. Wix Dashboard.

Navigate to Marketing Integrations.

Tap on Viewbelow Facebook Pixel & CAPI.

Next, tap on the More Actions icon in the upper right corner.

Select Delete.

In the pop-up window that pops up, tap the delete button on the pop-up that appears.

How to Check if the Facebook Pixel Has Been Deleted

If you’ve employed one of these methods to eliminate the Facebook pixel, verifying if the Pixel was removed is essential.

The most efficient method to verify whether the Facebook pixel is gone and is no longer transmitting pixel data from your site to Facebook is to use this extension: Facebook Helper Chrome Extension. Helper Chrome extension.

After your Facebook Pixel chrome extension is installed Facebook Pixel chrome extension, go to your site and then click on the Pixel Helper to view all Facebook Pixels that are currently firing on your site.

Check your IDs for the current Facebook pixel to confirm that you deleted the correct FB Pixel.

Why Can’t I Delete Facebook Pixel?

With the recent upgrade to the Facebook management tool, businesses cannot completely remove the Pixel, but you can remove this from the ads Account.

To remove this Facebook Pixel, it is necessary that you need to be aware of how it was put in place on your website and also have access to the base code.

How to Delete a Facebook Pixel FAQs

How do I remove an inactive Facebook Pixel?

It is impossible to remove the inactive Facebook pixel. But, you can delete the ad manager from it, change its name, or remove the code on your site.

To eliminate an unactive Facebook Pixel from your Ads manager, just follow these steps:

Sign in to your Facebook account and navigate to the business manager by visiting www.https://business.facebook.com/

Log into your business settings.

Tap Data Sources. After that, click pixels. There will be every one of the Facebook pixels and the ads associated with your Account.

On the right side of the screen at the top right, tap “Connected Assets.”

Next, you need to hover over the Facebook Pixel you would like to remove and click”Trash.

Then you can finally click “Confirm” to remove the pixels.

How do you remove a Facebook Pixel event?

To remove a Facebook Pixel event, you need to start to use the Facebook tools for events. Enter the URL of your site or the URL for the landing page for the event you wish to remove.

When the site loads, it will display the tool for setting up events that display all the listed events on the site.

Click on the trash icon next to the Facebook event you wish to erase.

Can I delete a Facebook Pixel?

In the past, you could remove Facebook pixels; however, after the change to Facebook Business Manager, it no longer removes Facebook pixels.

The only choice available to advertisers is to delete the Facebook Pixel from their ads Account. Is to remove their Facebook Pixel basis code on their site.

How to get rid of Facebook Pixel data sources

To get rid of your Facebook Event Data Source, just visit your website’s header and erase the Facebook base code for the Pixel.

Be sure to know the specific Facebook data source code before you delete it.

Conclusion

Inactive Facebook pixels can create a mess on your dashboard. This is the necessity to clean up by getting them off your dashboard.

Following this step If you follow this guide, you will be able to remove inactive Facebook pixels from your advertisements manager or business manager and your website.